Add Google test directly to your Visual Studio project
Why?
While it is easy(ish) enough to add google test using various packages, you might want to add it directly to your project, (to debug your tests and so on).
I also found that packages are not always as often as you might want, so it might be because you need a new feature or something added to your test.
Before we start
– I am using Visual Studio 2019, but it should work fine with 2017 and even 2015
– I am using the latest Google Test (v1.10 at the time of writing this, but the principle is the same for almost all versions and should work fine for a few versions.
Getting started
- Go to Google test on Github and get the latest release, make sure you get the ‘source code’
- Don’t get it from anywhere else, you don’t know what has been changed and who changed it!
- Remember that google test is written to a test application, not your main application!
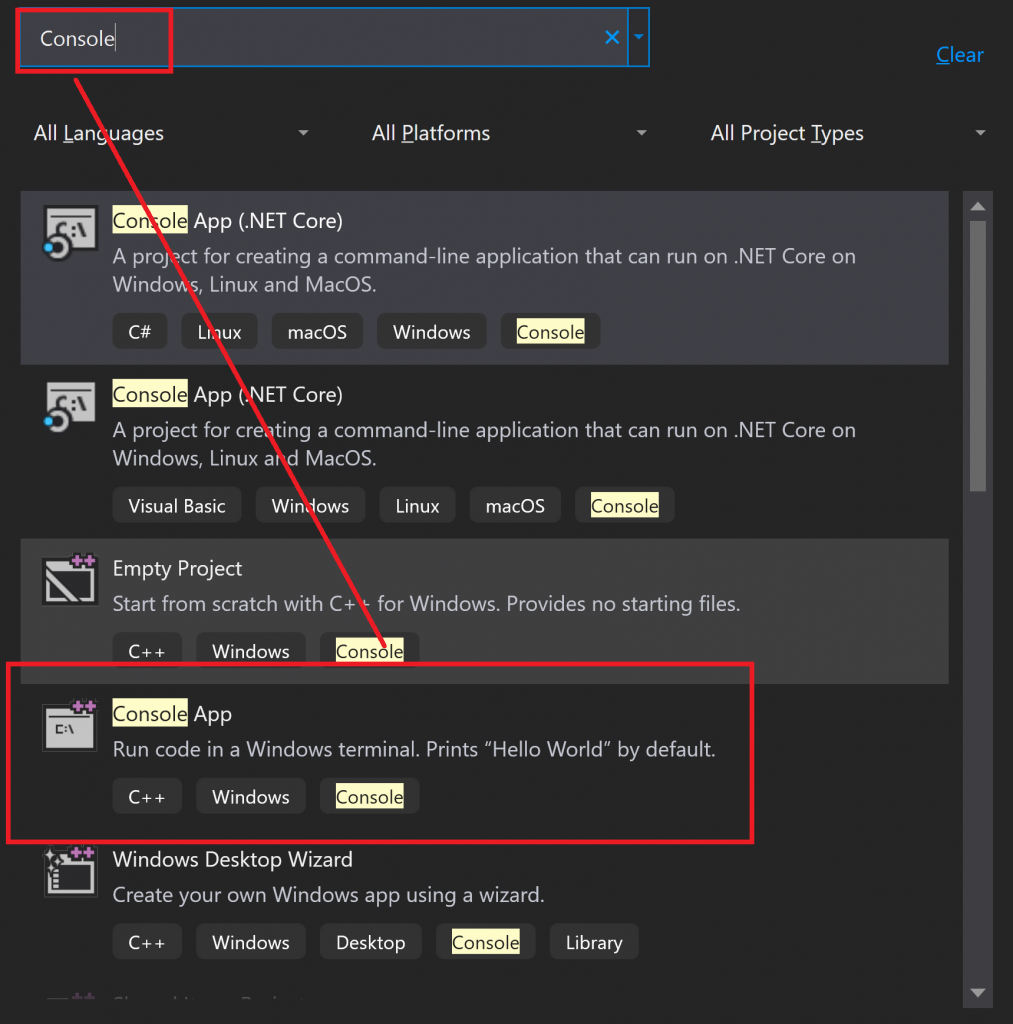
- Create a new console application, (File > New > Project …) and select “Console App”

Now add Google Test
- Download the latest release of Google test and extract it in your project folder, (of course create a sub folder of sort).

- In your project, create a new ‘folder’, I normally prefer to have it mirror what it looks like in my actual windows source code directory, but you could call it whatever you want, (like I did below).

- Right-click on the ‘src’ folder and select “Add > Existing Items…”
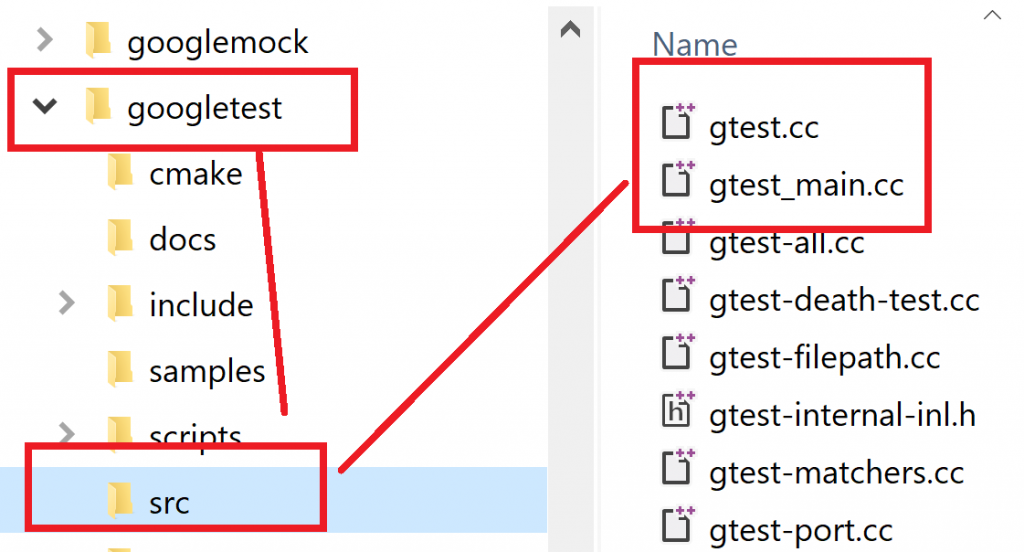
- Navigate to the folder you extracted, and find the ‘googletest > src’ folder

- And then select ‘gtest_main.cc’ and ‘gtest-all.cc’, nothing else.

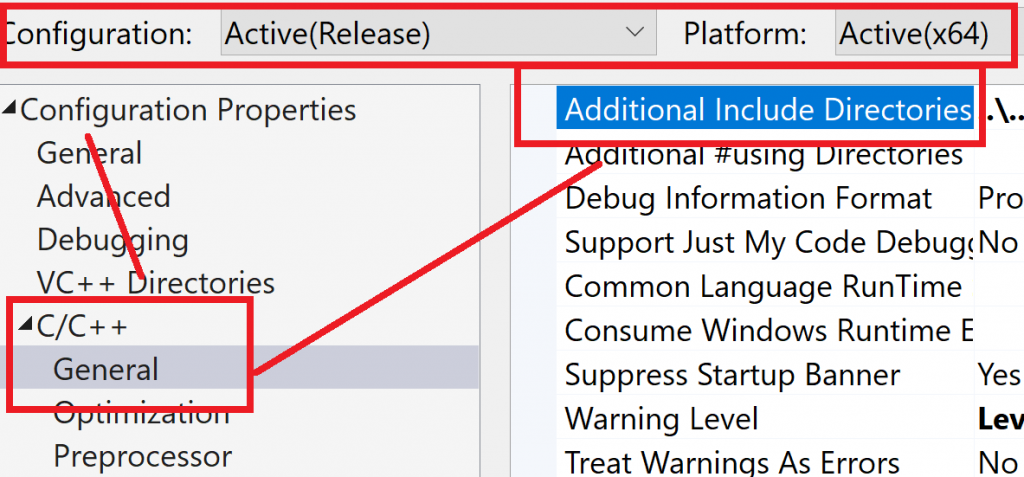
- Finally, right-click your project and select “properties” and edit the “Additional Include Directories”

- Add the directory relative to the location of your solution
You could enter the full path if you want, (but that … blah), or you could use macros …
Either way, make sure that the path is valid.

- Make sure that the changes you make apply to all your build configuration.
In the screenshot above I havex64andReleasebut make sure that you choose all the configurations you will be using. - Compile your code … nothing funny should happen, (’cause you did nothing really).
If you get an error, double check your paths and permissions.
Write and run a test
Last but not least, write a very simple test in your main and run a test
You do the rest
Now that a simple test is running, you can start creating tests for your own project.
|
1 2 3 4 5 6 7 8 9 10 11 |
#include <gtest/gtest.h> TEST(EngineString, Basic) { const auto data = "abcdefg"; ASSERT_EQ(data, u"abcdefg"); } int main(int argc, char **argv) { ::testing::InitGoogleTest(&argc, argv); return RUN_ALL_TESTS(); } |
Example?
Have a look at my directory watcher project and see my own tests.
As an aside, I am alway looking for comments, reviews and so on, please have a look at the project and comment!
Recent Comments